How to Manage App Store Connect From Your iPhone
You can manage much of App Store Connect from an iPhone with Apple’s official App Store Connect app. Its documented mobile features cover app status and submissions, TestFlight builds and testers, performance and sales, customer reviews, notifications, and marketing assets. Building and uploading the app binary still requires a separate Apple-supported workflow.
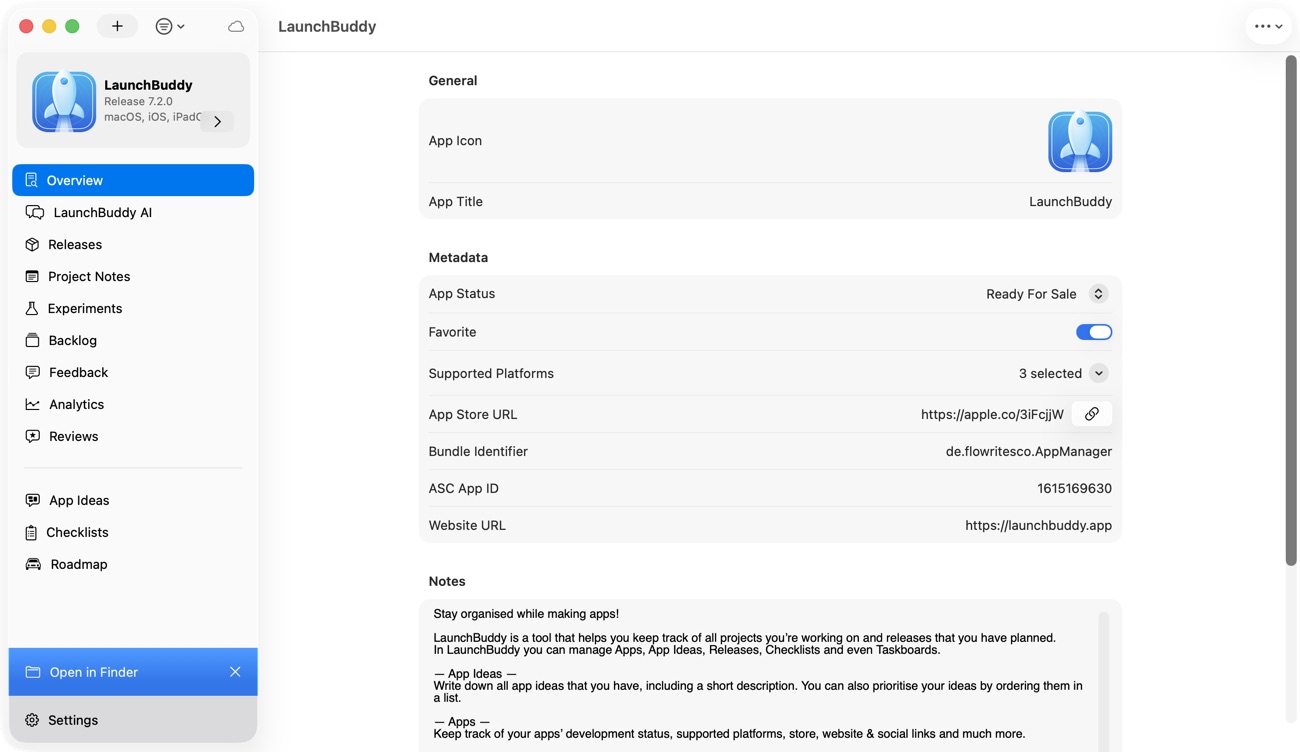
For a complete mobile release workflow, give each tool one job. App Store Connect should remain the source of truth for Apple’s app, build, submission, and distribution records. LaunchBuddy can hold the release scope, tasks, checklists, and follow-up decisions around those records. The broader LaunchBuddy vs App Store Connect comparison explains why the two are companions rather than substitutes.
What you can manage from an iPhone
Apple’s current App Store Connect for iPhone and iPad guide lists these mobile capabilities:
- Check app status and handle App Store submissions
- Manage TestFlight testing by adding builds and testers
- View screenshot and crash feedback from testers
- Monitor app performance and sales
- View and respond to customer reviews
- Receive notifications for status changes, reviews, tester feedback, and selected featuring events
- Generate marketing assets for launches, new versions, and selected App Store placements
Here, “manage” needs one important boundary. Adding an already uploaded build to a TestFlight workflow isn’t the same as uploading the binary from an iPhone. Apple’s build-upload guide names Xcode, Swift Playgrounds, altool, Transporter, Xcode Cloud, and supported API workflows. Plan that build handoff separately.
LaunchBuddy covers a different mobile layer:
| Job on iPhone | Authoritative tool | LaunchBuddy’s role |
|---|---|---|
| Check Apple’s app or submission status | App Store Connect | Keep the next task and release decision beside the version |
| Manage TestFlight builds, testers, and feedback | App Store Connect | Track the testing work that blocks or follows the release |
| Review sales and app performance | App Store Connect | Pro shows selected downloads, revenue, and subscription metrics near the release plan |
| Read and respond to reviews | App Store Connect | Pro provides a reviews inbox, reply workflow, and review-to-task path |
| Upload an approved “What’s New” draft | App Store Connect record | Pro can upload approved release notes with configured API credentials |
| Build, sign, or upload the binary | An Apple-supported upload workflow | No verified build, signing, or binary-upload capability |
| Define scope, tasks, and submission checks | LaunchBuddy | Organize version-scoped work and default or custom checklists |
Clear ownership prevents a convenient mobile view from becoming a second, conflicting source of App Store state.
Set up a two-lane mobile release workflow
Treat the iPhone workflow as two connected lanes: Apple’s official record and your operating plan.
1. Prepare official mobile access
Install Apple’s App Store Connect app and sign in with a user who has the role required for the intended action. Apple notes that a newly added App Store Connect user may need to wait up to 24 hours before the mobile app becomes available to them.
Do not test access for the first time during a release incident. Before you need the phone workflow, confirm that:
- The expected team and apps appear
- Submission status is visible
- TestFlight groups and builds are available
- Reviews and performance data load for the intended apps
- Push notifications are configured at a useful level
Apple applies role requirements to individual actions. For example, its review-response documentation requires the Account Holder, Admin, or Customer Support role to publish a response. Seeing an app does not prove that every write action is permitted.
2. Set up the release workspace
In LaunchBuddy, create or select the app and release, then record:
Release: 2.4
Goal: Fix failed receipt restoration
Candidate build: 104
Release owner: You
Current Apple status: Build processing
Next official action: Add build 104 to internal TestFlight group
Release blockers:
- Verify receipt restoration on a clean install
- Confirm reviewer instructions
- Approve customer-facing release notes
Release planning, taskboards, default submission checklists, and iCloud sync are available in the core workflow on iPhone, iPad, and Mac. The free plan is limited to two apps and two releases. Custom checklists and App Store Connect features require Pro.
LaunchBuddy’s connected App Store workflows also require App Store Connect API credentials. Use a dedicated key with suitable permissions, protect its private key, and test reads before writes. The App Store Connect API key guide covers the setup and security boundary.
3. Declare one owner for every state
Write down which system answers each question:
Did Apple receive and process the build?        App Store Connect
Which build is in the TestFlight group?         App Store Connect
Was the submission sent to App Review?          App Store Connect
Which tasks must finish before submission?      LaunchBuddy
Why was a feature removed from version 2.4?     LaunchBuddy
Which review became a follow-up task?           LaunchBuddy
Avoid copying an Apple status into a free-form task and then trusting the copy. If you record the status for context, include when you observed it and make the next step “verify in App Store Connect.”
Manage a release from your iPhone step by step
Start this workflow once the code is ready for a candidate build.
Step 1: Review the release boundary
Open the release plan before taking an App Store action. Confirm the version goal, included fixes and features, deferred work, testing requirements, metadata tasks, and reviewer needs.
The review catches a common mismatch: the build exists, but the release notes or checklist still describe work that was cut. Remove deferred work from public copy before it reaches Apple.
Step 2: Upload the binary through a supported route
Building and uploading is a separate handoff, not an iPhone App Store Connect task. Use the Apple-supported route that fits your project, such as Xcode, Transporter, Xcode Cloud, or a supported API process.
Record the version and build string in the release workspace. When the build appears on your iPhone, match both values before assigning it to testers or a submission. “A new build is available” is not enough when several candidates were uploaded close together.
Step 3: Run the TestFlight decision loop
Use the official App Store Connect app to add the processed build and testers, then review screenshot and crash feedback. Keep each finding in one of three lanes:
- Release blocker: The candidate can’t ship until this is resolved.
- Later work: The evidence is useful, but it does not block this version.
- No action: The report is duplicate, unsupported, expected, or outside the release goal.
Create a LaunchBuddy task only when the feedback has a concrete next action. Include the affected build, evidence, severity, and done condition. This keeps TestFlight as the beta source while preventing useful findings from disappearing when you switch builds.
Step 4: Approve the release notes against the candidate
Draft “What’s New” copy from completed, user-visible work. Check every sentence against the candidate build and remove internal refactors, unverified performance claims, and fixes that moved to a later release.
With Pro and configured App Store Connect credentials, LaunchBuddy can upload approved release notes from the mobile workflow. That capability is limited to release-note copy. It does not upload the binary, choose the build for you, or submit the app autonomously.
Use this final check:
Candidate build matches the release record: Yes / No
Every stated feature is present: Yes / No
Every stated fix was verified: Yes / No
Deferred work removed: Yes / No
Public wording approved: Yes / No
If any answer is no, stop the copy upload and resolve the mismatch.
Step 5: Submit and monitor in Apple’s app
Apple explicitly lists submission management as an App Store Connect mobile capability. Use the official app to handle the action available for that record, then verify the resulting status there.
Do not collapse several states into “submitted.” Apple’s submission instructions distinguish preparing a draft, adding an app version for review, and finally sending that draft to App Review. On mobile, read the displayed status after the action instead of assuming a tap completed the whole sequence.
When a notification arrives, open the app record and verify:
- Which app and version changed
- The current official status
- Whether Apple needs a response
- Whether the release plan needs a new task or decision
A notification is a prompt to inspect the record, not the record itself.
Step 6: Run the post-release loop
After the version becomes available, use the iPhone for short, decision-led checks:
- Confirm the expected version is available in the intended storefront
- Review new customer feedback
- Check performance and sales for a defined comparison period
- Separate urgent regressions from ordinary variation
- Create a follow-up task only when there is evidence and a next action
LaunchBuddy Pro can bring reviews and selected downloads, revenue, and subscription metrics closer to the release. Apple’s dashboards remain the place for official definitions, deeper segmentation, and financial reconciliation.
For customer feedback, use a repeatable App Store review management workflow rather than turning every low rating into a bug. For metric interpretation, the App Store Connect analytics guide explains why downloads, installations, proceeds, and subscription measures should not be treated as interchangeable.
A worked mobile handoff for a hotfix
Suppose version 2.3 has a confirmed purchase-restoration defect and build 104 contains the smallest verified fix.
LaunchBuddy on iPhone
  1. Create release 2.4 with one fix goal.
  2. Add clean-install, existing-user, and sandbox-purchase checks.
  3. Record build 104 as the candidate, not as approved.

Mac or upload automation
  4. Build, sign, and upload build 104.

App Store Connect on iPhone
  5. Confirm build 104 finished processing.
  6. Add it to the intended TestFlight group.
  7. Review tester feedback and crash evidence.

LaunchBuddy on iPhone
  8. Close only the checks actually verified.
  9. Approve release notes that mention only the restoration fix.
 10. Upload the approved notes with Pro and API credentials.

App Store Connect on iPhone
 11. Handle the submission and verify the official status.
 12. Monitor App Review messages and the eventual release state.

After release
 13. Check current reviews and relevant performance signals.
 14. Record follow-up work against version 2.4.
The benefit isn’t squeezing every step onto one device. It is preserving the app, version, build, evidence, owner, and next action at each handoff.
Know where the iPhone workflow stops
Apple’s mobile app is capable, but its published feature list is not a promise that every App Store Connect field and account operation is available on iPhone. When an action is missing, use App Store Connect on the web or another documented Apple tool. Do not substitute a third-party planning state for the official record.
Keep these limits explicit:
- LaunchBuddy does not build, sign, or upload app binaries.
- LaunchBuddy does not autonomously submit an app.
- App Store Connect owns the official build, TestFlight, App Review, pricing, availability, agreement, and financial records.
- LaunchBuddy’s reviews, selected analytics, review-to-task, and release-note upload require Pro and App Store Connect credentials.
- LaunchBuddy’s selected analytics do not replace Apple’s full dashboard or financial reports.
- iCloud sync keeps LaunchBuddy project data current across supported devices; it does not change Apple’s records by itself.
The minimal iPhone release runbook
Save this short version for the next update:
Before leaving the Mac
- Candidate uploaded through an Apple-supported route
- Version and build recorded
- Release blockers named

On iPhone
- Verify build and official status in App Store Connect
- Manage TestFlight and classify feedback
- Finish the release checklist
- Approve build-accurate release notes
- Handle submission in Apple's app
- Reopen the record and verify the resulting status

After release
- Confirm availability
- Triage reviews
- Compare a complete analytics period
- Create only evidence-backed follow-up tasks
Managing App Store Connect from an iPhone works best when “mobile” does not mean “memory.” Keep Apple’s records authoritative, preserve release decisions in a version-scoped workspace, and make every handoff identify the exact build and next action.
If that mobile release layer would help your next update, download LaunchBuddy on the App Store and start with one release.